Zapier
Zapier is a powerful automation tool that allows you to connect your Reform with thousands of apps and services. In this guide, we'll walk you through setting up the Zapier integration using Webhooks as an example. Feel free to explore other triggers and actions available in Zapier that suit your needs.
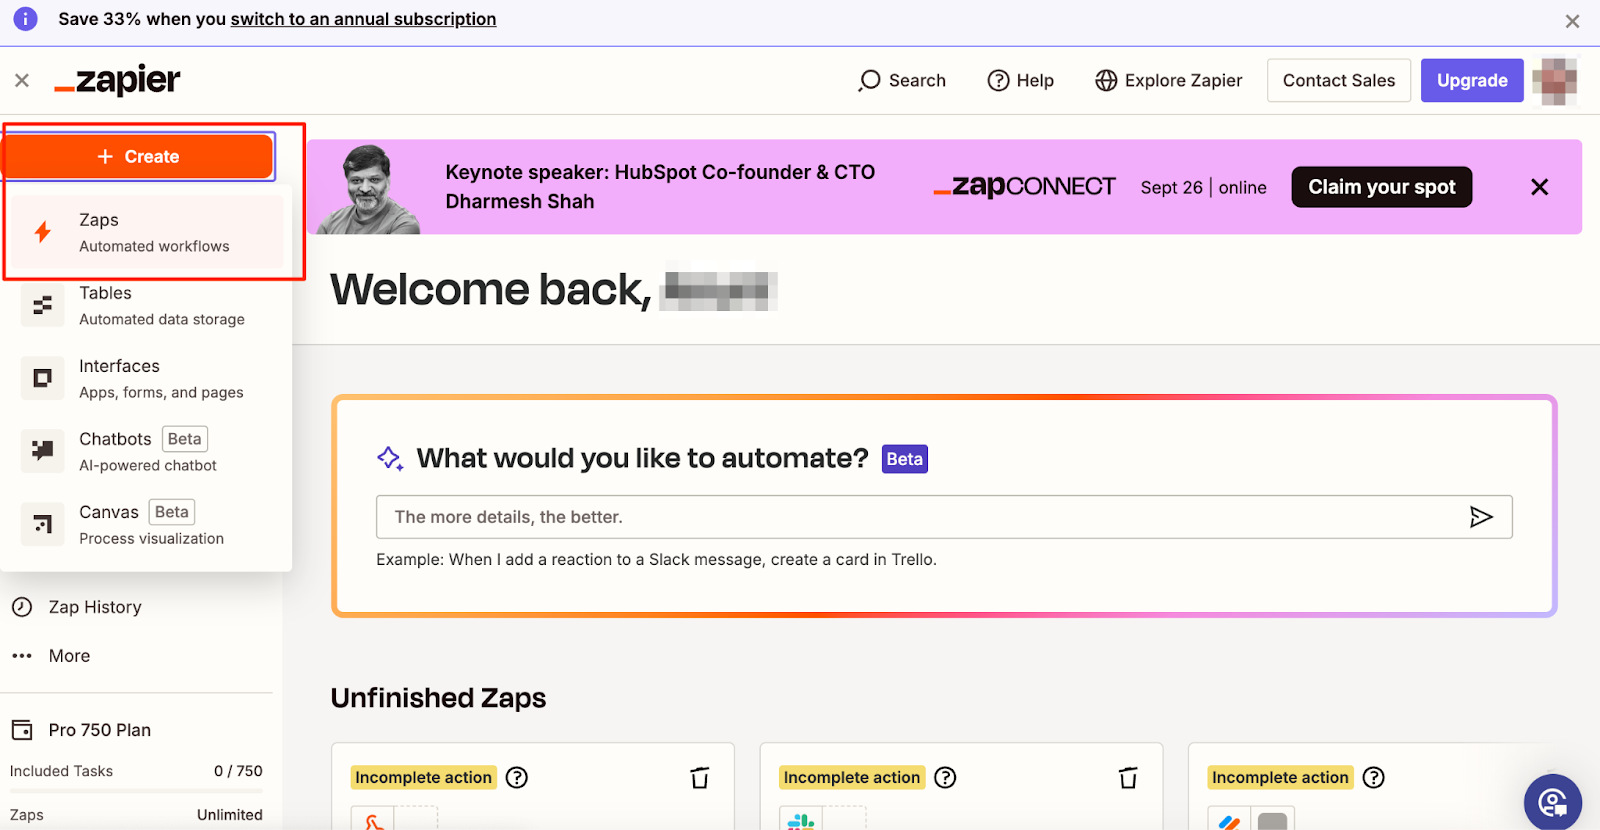
Step 1: Start from the Zapier Home Page
- Log in to Zapier: Start by logging into your Zapier account.
- Create a Zap: On the Zapier home page, locate the Create button at the top of the menu on the left side of the screen and click on it. A menu will expand with several options.
- Select Zaps: From the expanded menu, choose the Zaps option. This will take you to the Zaps creation page.
Step 2: Set Up a Trigger for Your Platform
The first thing you need to do is set up a trigger - that’s Reform in this case. In this example, we’ll use a Webhook.
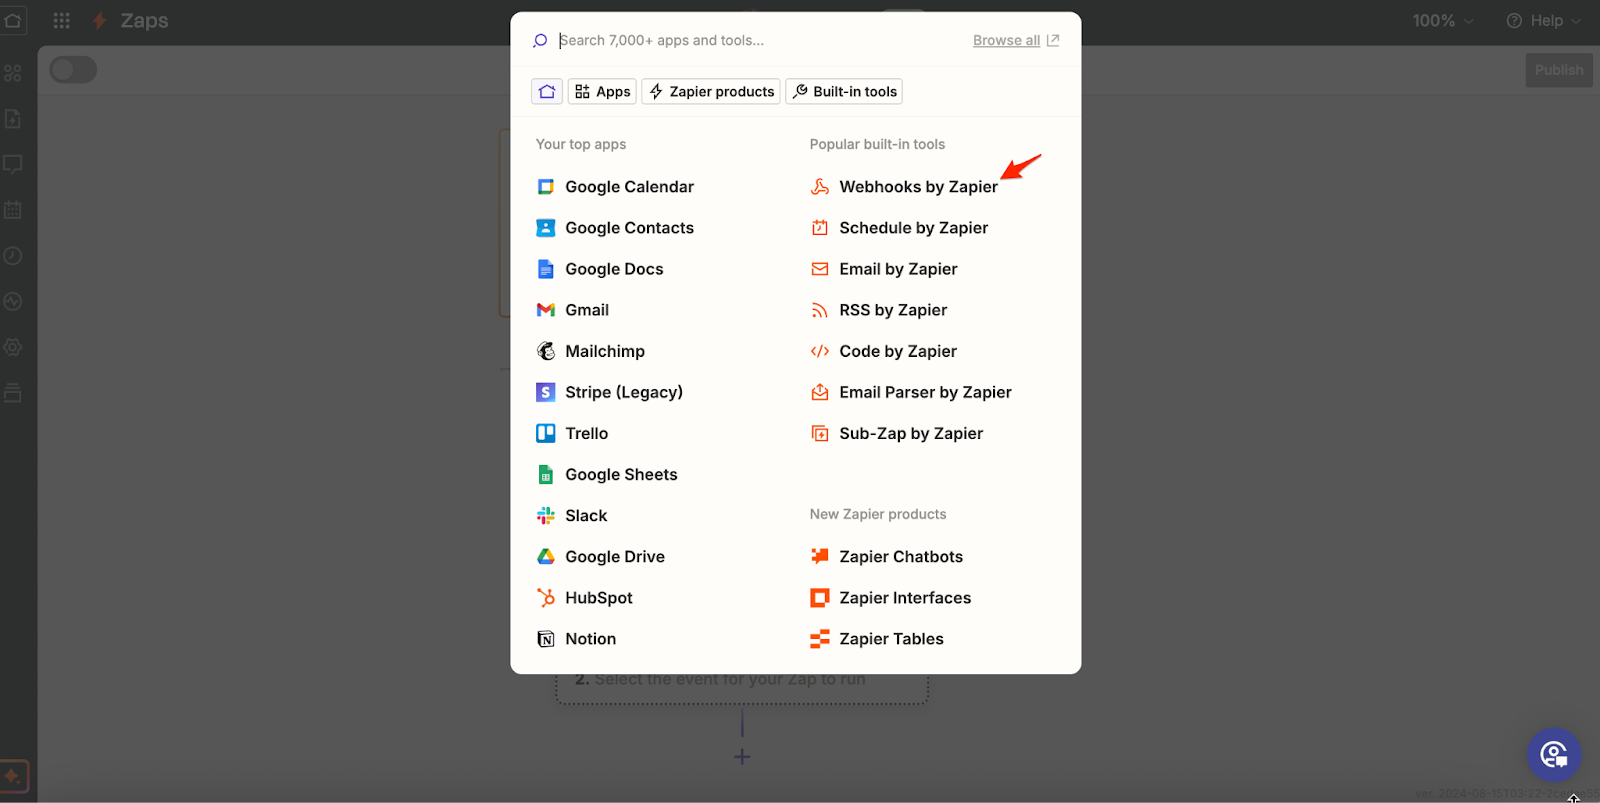
- Click on Trigger: On the Zaps creation page, click on the Trigger option to start setting up your trigger.
- Choose Webhooks by Zapier: In the list of available trigger apps, select Webhooks by Zapier. This will open a menu on the right side of the screen where you can select specific events.
- Select a Trigger Event: From the dropdown menu, choose Catch Hook as the trigger event. This option allows Zapier to receive data from your form when the webhook is triggered.
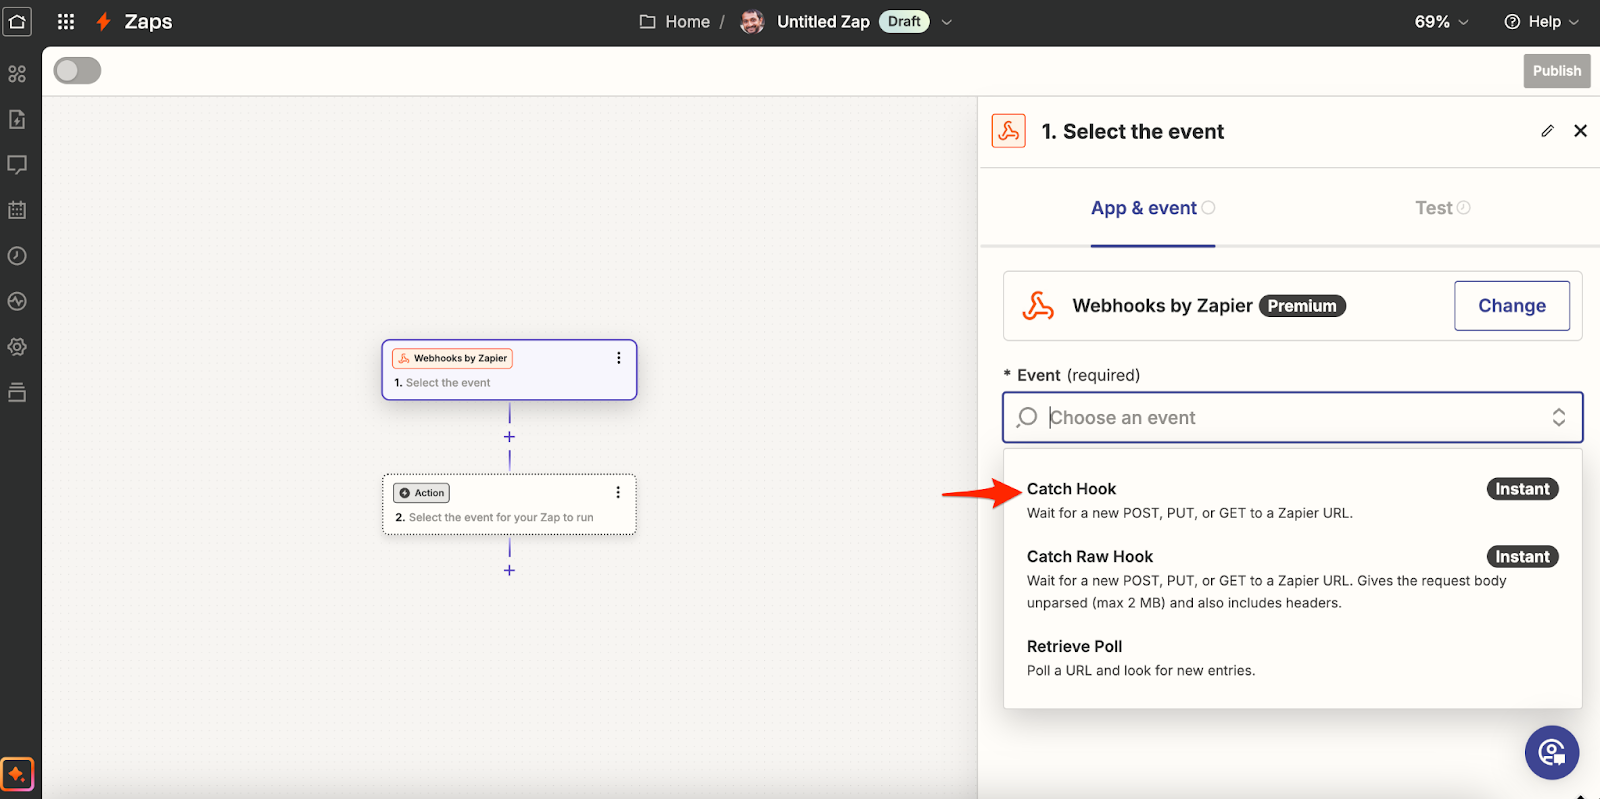
- Click Continue: After selecting the trigger event, click on Continue.
Step 3: Handle the "Pick off a Child Key" Field
After selecting Catch Hook as your trigger event, Zapier will display a field labeled Pick off a Child Key. This field is optional and is used to filter out specific parts of a larger JSON payload that your webhook might send.
- What to Do: If you know the exact part of the payload you want to capture, you can enter the child key here (for example, if your webhook sends multiple pieces of data and you only want a specific part).
- If You're Unsure: If you're not sure what to enter, or if your webhook data doesn’t require filtering, you can leave this field blank. Zapier will then capture all the data sent by your webhook.
After handling this field, click Continue.
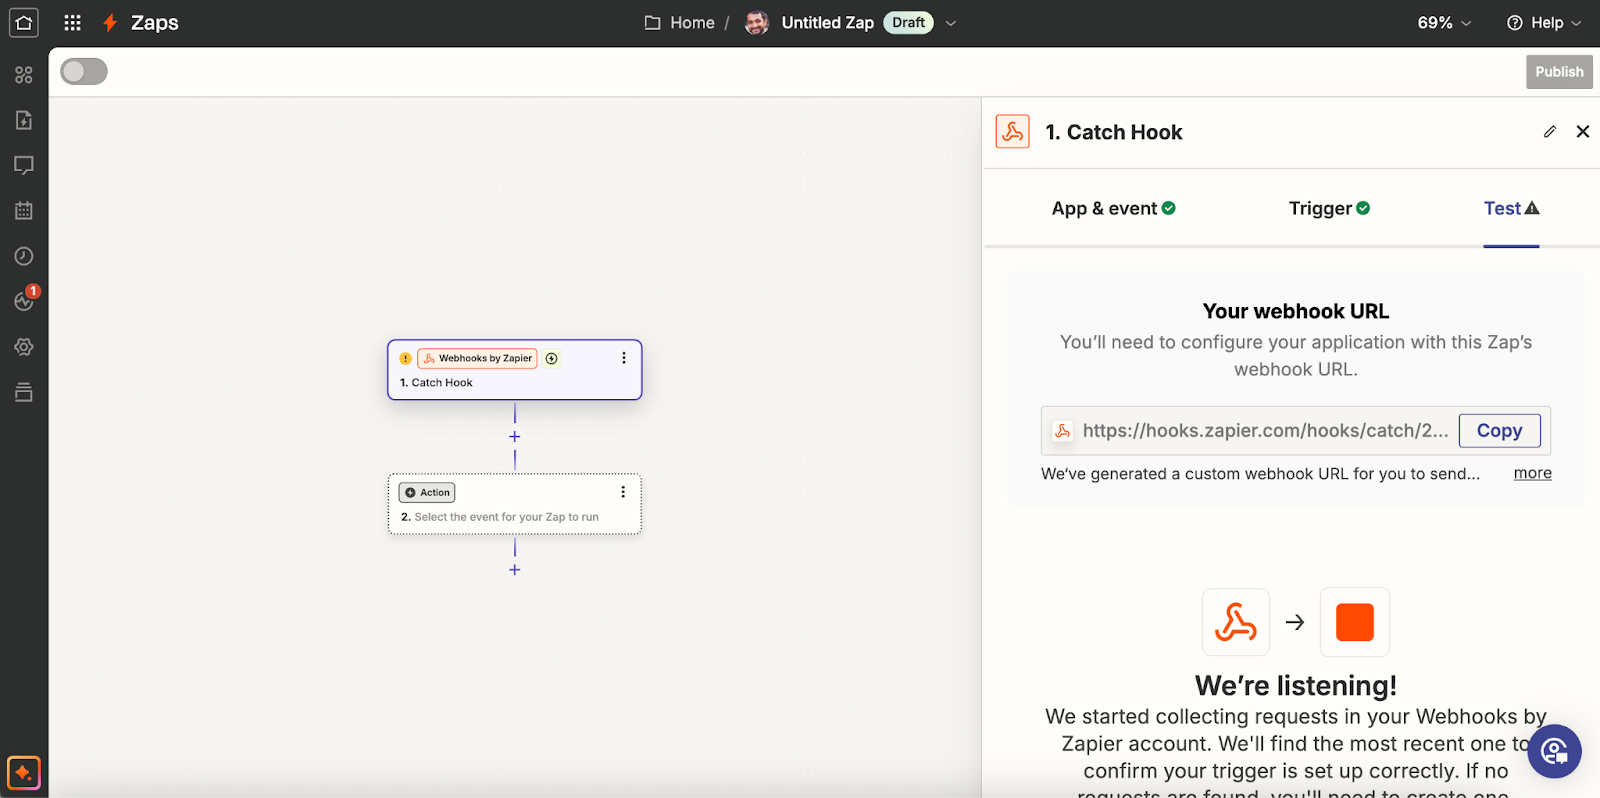
Step 4: Copy the Webhook URL
- Get the Webhook URL: Zapier will now generate a unique webhook URL for you. Copy this URL to your clipboard.
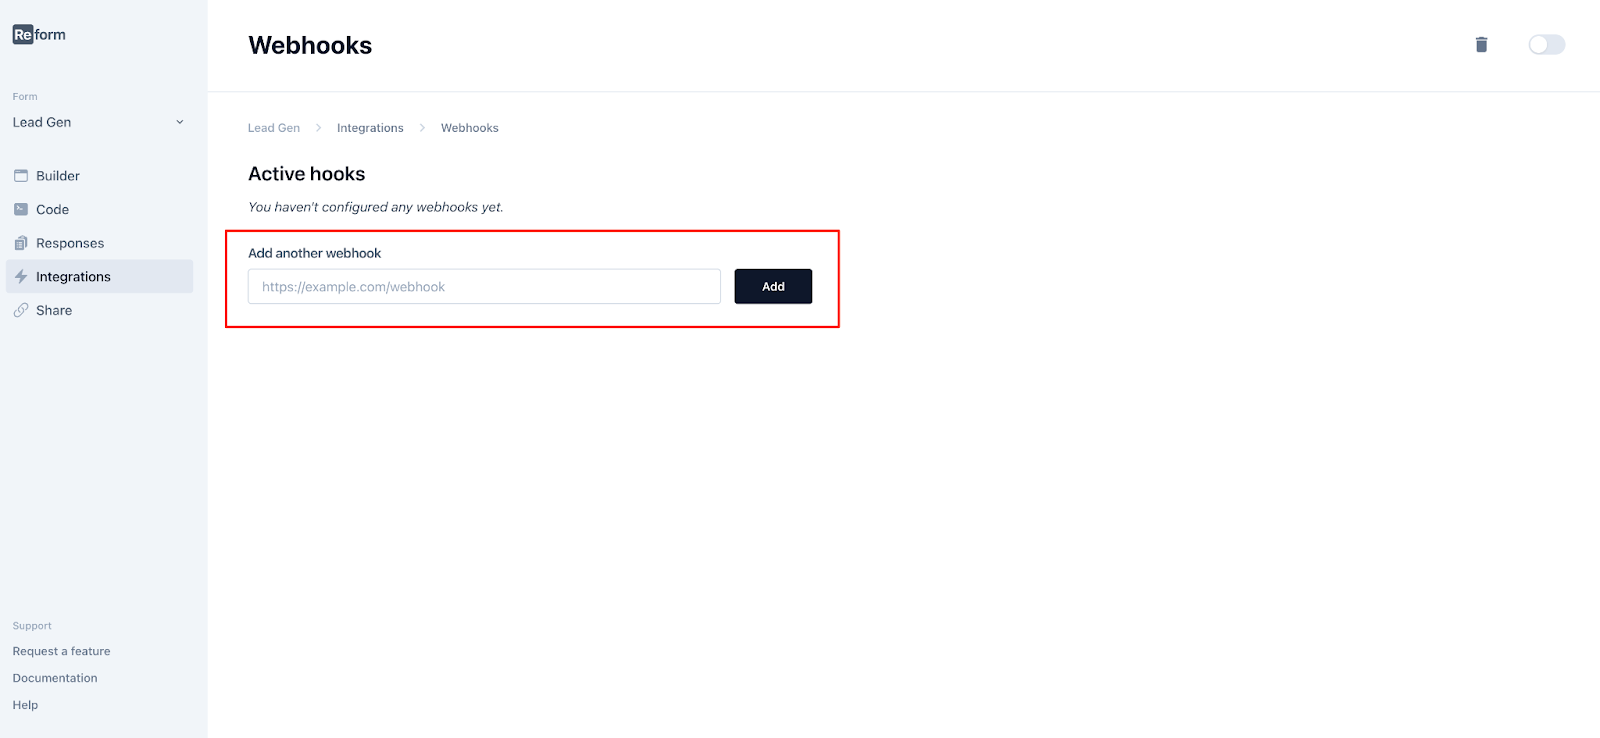
Step 5: Set Up the Webhook in Reform
- Enable Webhook Integration: Navigate to the Integrations page on the Reform dashboard. Find the Webhook integration option and click on Add Integration.
- Paste the Webhook URL: Paste the webhook URL you copied from Zapier into the designated field.
- Click on Add Webhook: Once pasted, click on Add to save the integration.
- Make sure to switch the toggle at the top right corner of the page to turn it on.
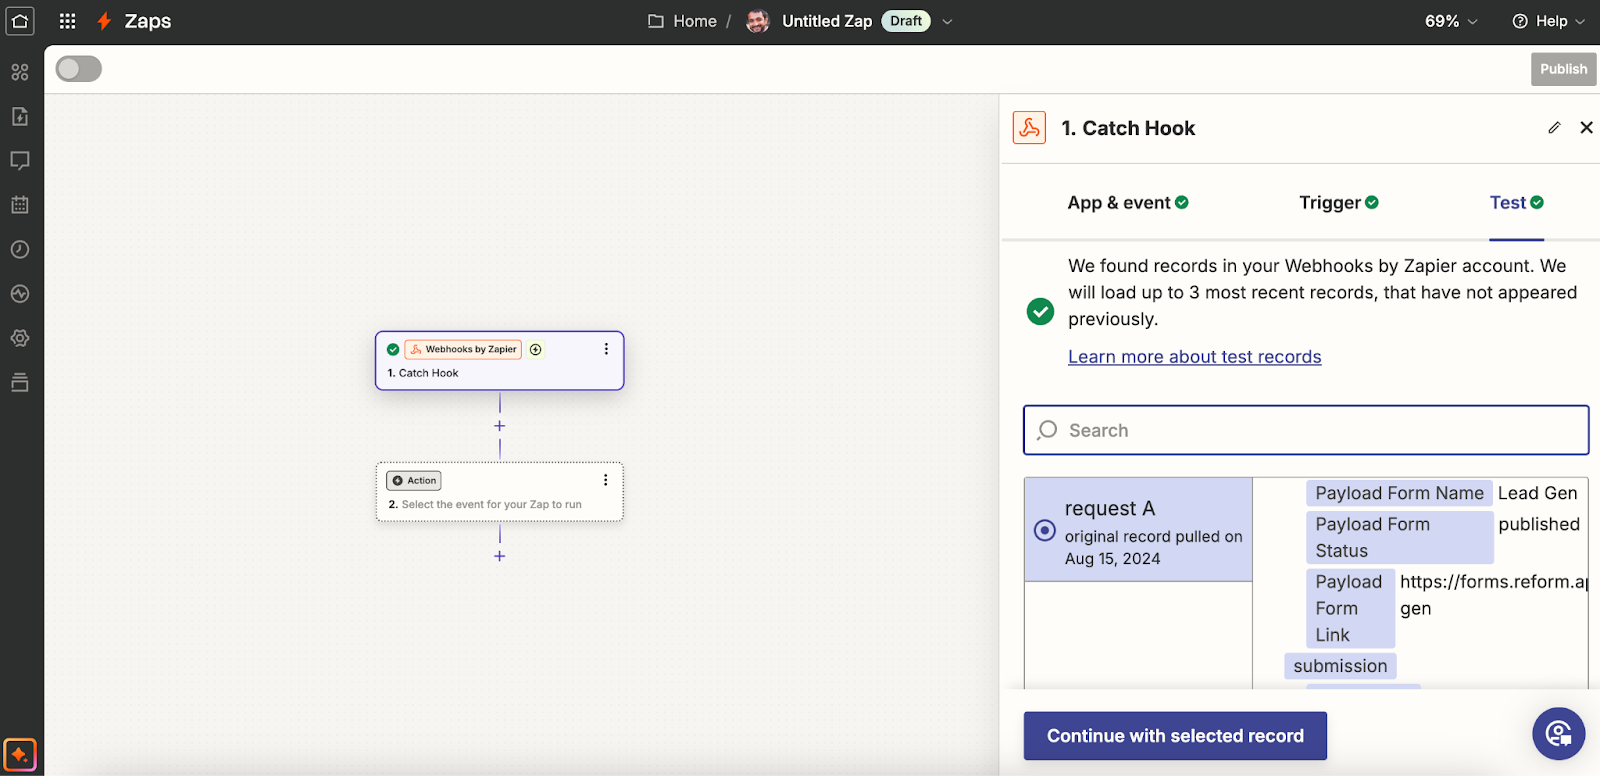
Step 6: Test the Trigger
- Test Your Trigger: Zapier will prompt you to test the trigger to ensure everything is set up correctly.
- To do this, fill out your form on your platform as you normally would.
- Once completed, go back to Zapier and click on Test Trigger.
- Review Data: Zapier will pull the data from your form submission. Check if all the necessary data has been captured correctly.
- Click Continue: If everything looks good, click Continue with selected record.
Step 7: Set Up the Action
Now that your Reform is connected to Zapier, you can choose where to send the data. For this example, we'll use Slack.
- Choose Slack: From the list of available apps in Zapier, select an app to receive the data (for this example - Slack)
- Select an Action Event: In the dropdown menu, choose Send Channel Message as the action event.
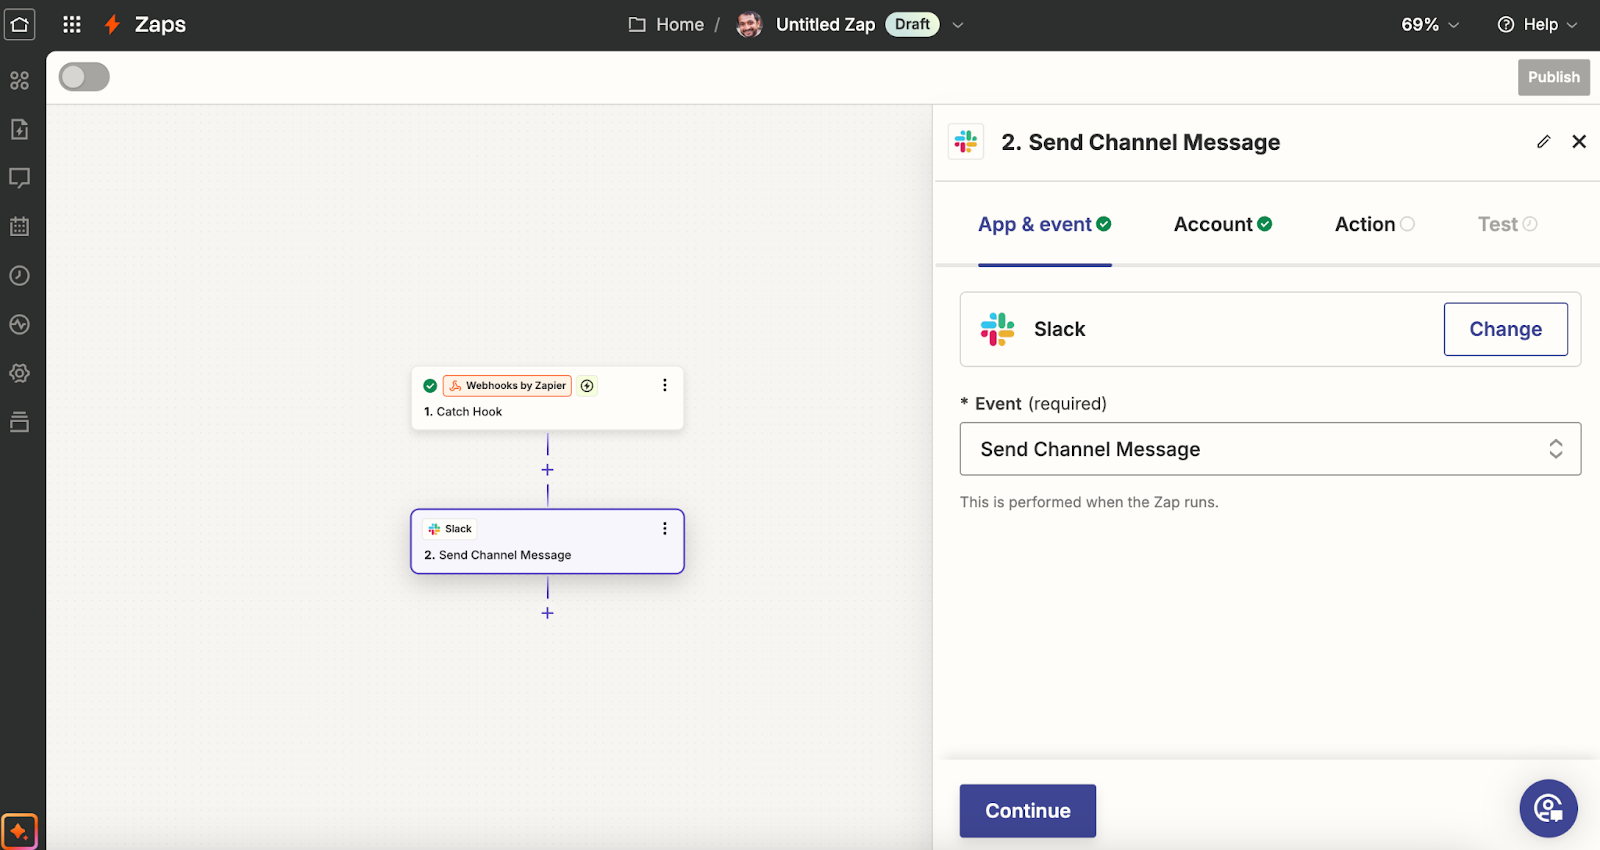
- Choose Your Slack Account: Zapier will ask you to select the Slack account you want to use. If you’ve already set it up, simply select the account from the dropdown and proceed.
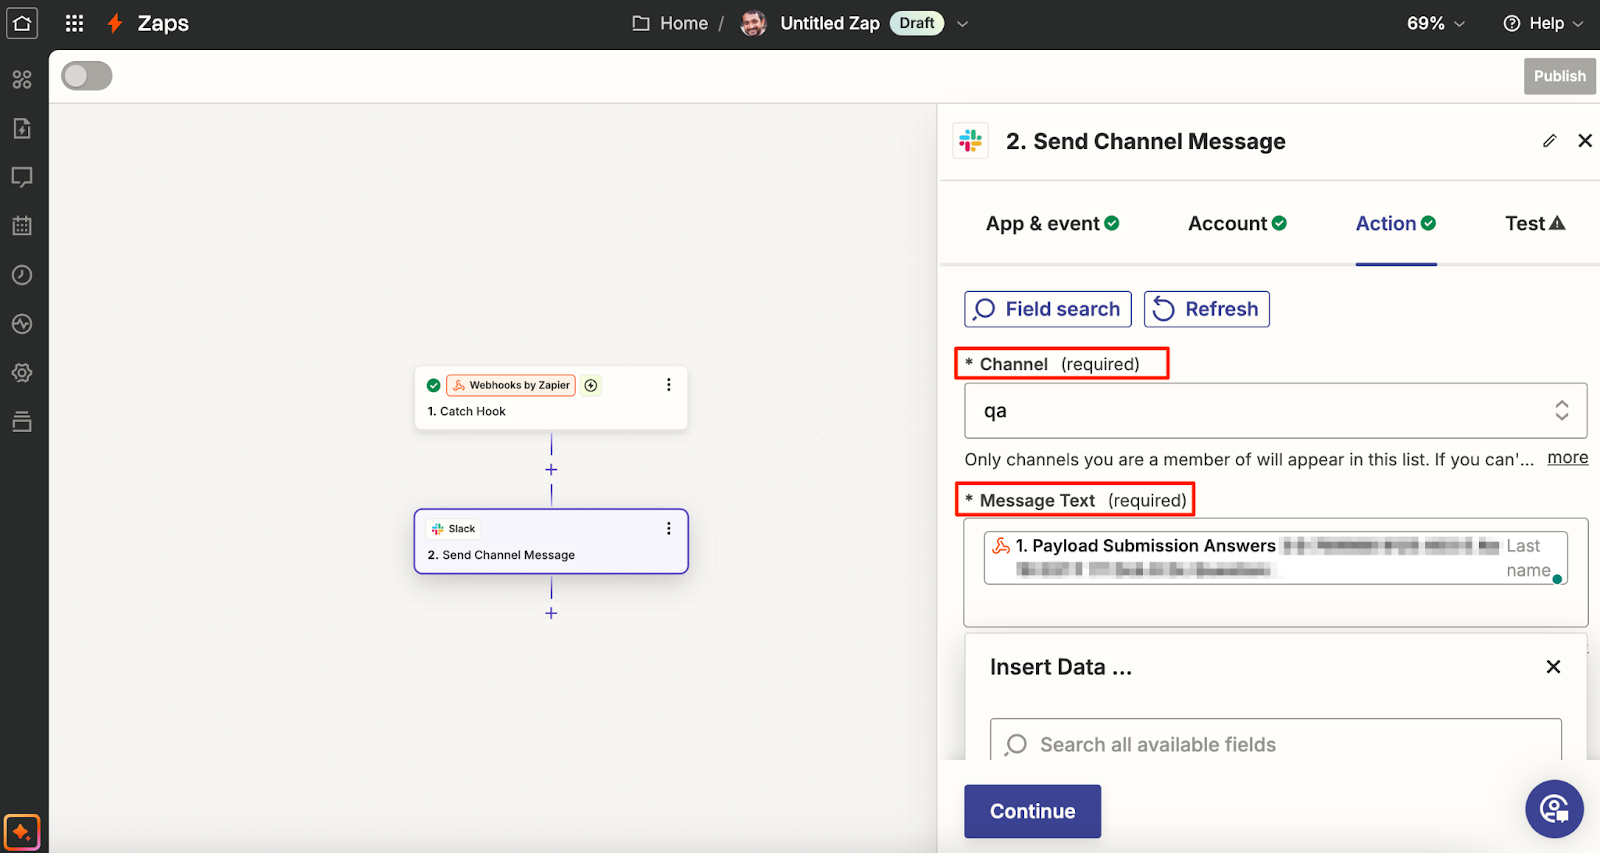
Step 8: Configure the Action
- Set Up the Action: You'll need to configure how the data is sent. Depending on the app, you might have various options to map the form data to the action fields.
- For Slack, you need to choose the channel where the answers will be sent to and the message that will be sent. Ensure that you map the appropriate form fields to the message content. It’s important to pick the ‘answer’ part.
- Click Continue: Once you've configured the action, click Continue.
Step 9: Test and Activate Your Zap
- Test the Zap: Before finishing, Zapier allows you to test the entire workflow to ensure that the data is correctly passed from your form platform to Slack.
- Activate Your Zap: If the test is successful, activate your Zap by clicking Turn on Zap.
You’ve successfully connected your Reform to Zapier using Webhooks. This is just one example of the many ways you can automate tasks with Zapier. Feel free to explore other integrations and customize them to fit your needs.
If you have any specific needs, suggestions or have questions, please contact us at [email protected]. We're here to assist you!